How To Make a Mosquito Killer Circuit
How to Make a Mosquito Killer Circuit: DIY High-Voltage Circuit Explained
The mosquito is not only annoying, but it is also dangerous, being a carrier of many diseases, including malaria, dengue, and Zika virus. Most people, of course, rely on mosquito-killing agents put up by others. But why not try to make one yourself right at home? This article discusses the making of a high-voltage mosquito killer and will give a brief overview of its working principle, components needed, and working of the circuit, thus giving you a clear view of how simple while being efficient this gadget is for eliminating such annoying creatures.
What Is a Mosquito Killer?
A mosquito killer circuit typically refers to a device that uses artificial means to attract, trap, and kill mosquitoes. Methods can include light, heat, and in some cases, electrocution. Most mosquito zapper devices work on the principle of an electric grid or grill that charges itself to very high potential difference and leads to the death of the insects when they come in contact with the grill. These are very commonly found in the outdoor gardens, patios or near any water body source-the prime habitats of mosquitoes.
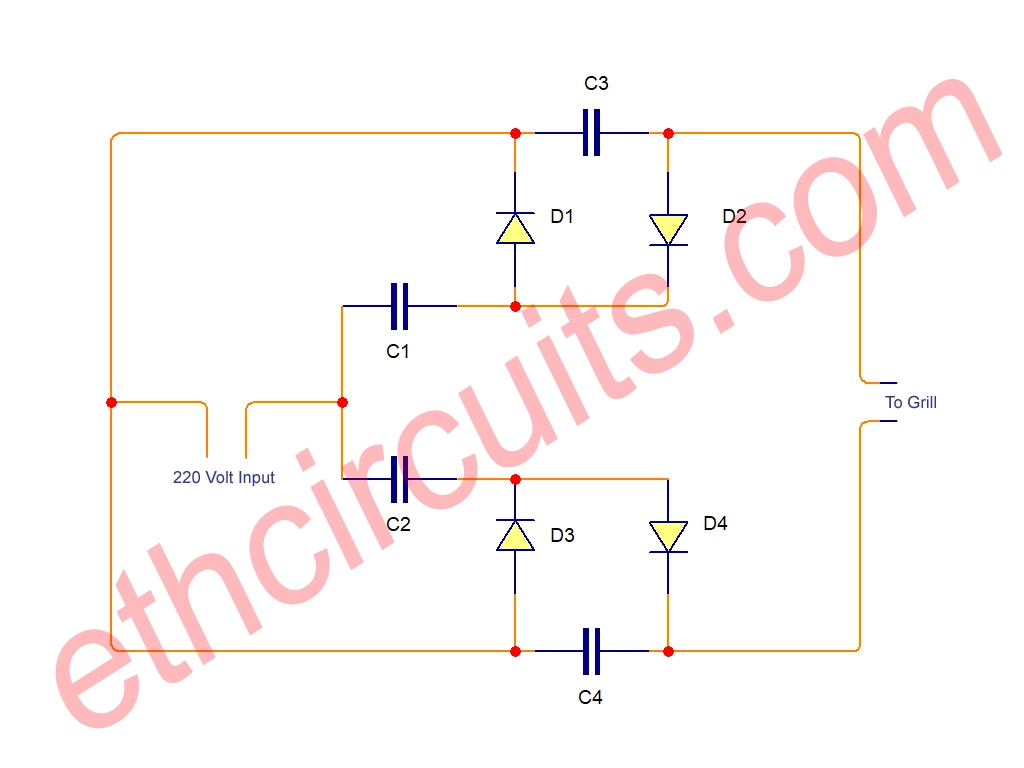
As the name suggests, this DIY mosquito killer circuit makes use of a circuit that generates high voltage output through which connection leads to a metal grill, which acts as the electric trap. The shock applies to mosquitoes when they come into contact. It’s efficient and cheaper compared to making the device by yourself.
Components Required for the Mosquito killer Circuit
Before diving into the broad strokes of how this contraption works, let’s take a moment to survey the list of components needed to assemble your own mosquito killer:
4 Blue LEDs
4 Diodes (1N4007)
1 Resistor (470 ohms)
1 Resistor (1 Mega ohm)
4 Capacitors (104/400V and 1 x 10⁵/250V)
Grill/Metal Mesh
Power supply (220V AC)
Mosquito Killer Circuit Diagram

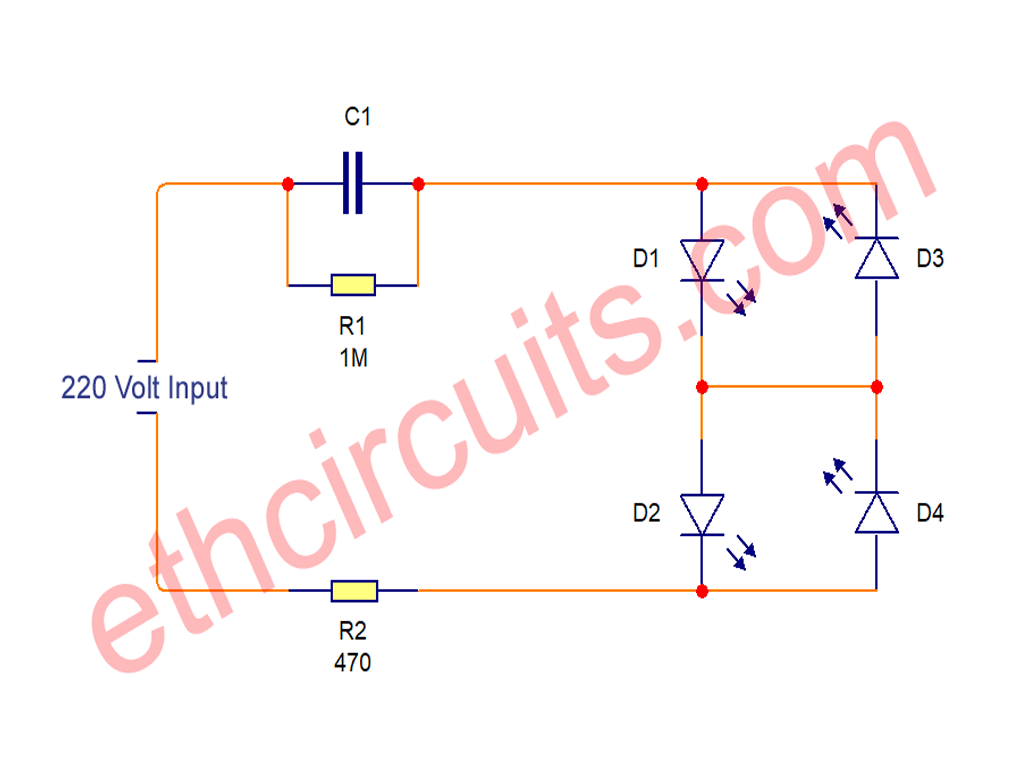
Circuit Diagram To On Blue LED with Direct 220 Volt AC

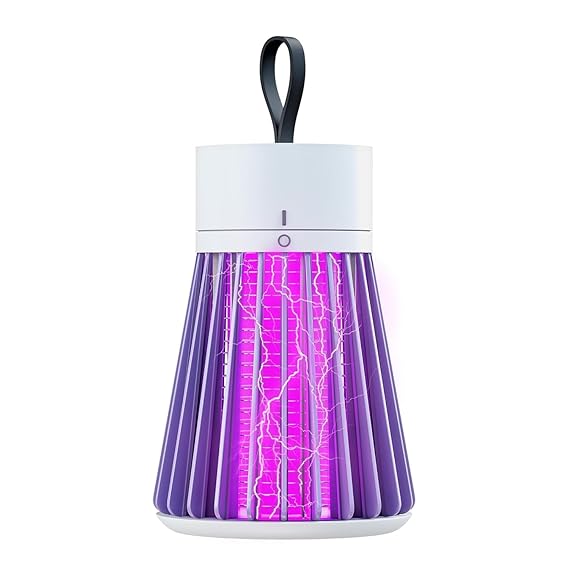
Buy at Amazon:- Eco-Friendly LED Mosquito Killer Machine – USB-Powered Indoor Bug Zapper with 6 Purple LEDs for Chemical-Free Pest Control
How the Circuit Works
Input Power: This circuit is connected to 220V AC line which has household electrical sources such as these bringing power into the circuit. The circuit comprises diodes, resistors, capacitors along with LEDs.
Rectification: The rectification is of course done by the diodes- in this case, the 1N4007. Rectification is converting the alternating current (AC) voltage from the power supply into a direct current (DC) voltage. It is through this means that one would be able to control the flow of current and ensure that the circuit runs as intended.
Voltage Multiplier: With capacitors and resistors, voltage input is augmented. Here they synergize because with capacitors, one can store energy and ohmic resistance limits the voltage across the circuit by allowing through a higher output voltage from the 220V AC.
Attraction of Blue LED: A combination of all these blue LEDs can be placed on the main circuit to provide lighting that can entice mosquitoes. This will be supplied with the DC output from the circuit; enticing mosquitoes into this device.
High Voltage at Grill: The whole circuit is contained within a metal grill or mesh known as an electric grid owing to accurate electric connections. Mosquitoes will pass through the electric grid upon contact and thus complete the circuit resulting in the flow of electricity through their bodies thereby killing them.
Safety Considerations: High voltage circuits may be extremely awful when not properly handled. Insulation and safety precautions are highly essential for a project with high voltage circuits. The high voltage hardware must be enclosed into a safe housing to prevent accidental contact.
Step-by-Step Assembly Process
Collection of circuitry components: For the initial step, bring out the components of the circuit diagram. Make sure that the diodes are aligned properly in the rectification and connected on their rightful positions of resistors and capacitors that will maintain the voltage.
Wiring of the LEDs: The blue LEDs should be attached in parallel with the other components so that they can form the attraction mechanism. Positioning them so that they are visible and likely to attract mosquitoes.
Setting up the Grill: Attach the metallic Grill at the output of the circuit. Ensure that the grill is connected to the high-voltage output in such a way that the mosquitoes will get electrocuted when they come in contact with it.
Power Connection: Carefully attach the circuit to 220V AC power supply. Ensure that all high voltage parts are insulated properly to avoid short circuits or electric shocks.
Testing the Device: After all connection has been made, it is time to power up and test the device. If the LEDs light up and mosquitoes go towards the grill, they would probably be seen zapping when they touch the high-voltage grid.
Watch Video for How to Make a Mosquito Killer Circuit
Designing your very own killer mosquito repellant treatment with the help of a high-voltage circuit is a fun and interesting project that anyone can undertake. By just using a few common electronics components like diodes, resistors, capacitors, and blue LEDs, very practical mosquito-killer devices can be created which work quite efficiently in getting the little nasty bugs out. However, always practice safety while handling high-voltage circuits to prevent injury.
By using the right materials and assembly, you can spend the rest of your life in a mosquito-free environment-a feat that would cost you money if accomplished by commercial factories. And you’d do it yourself!

